 "I wanna introduce you to a personal friend of mine…”
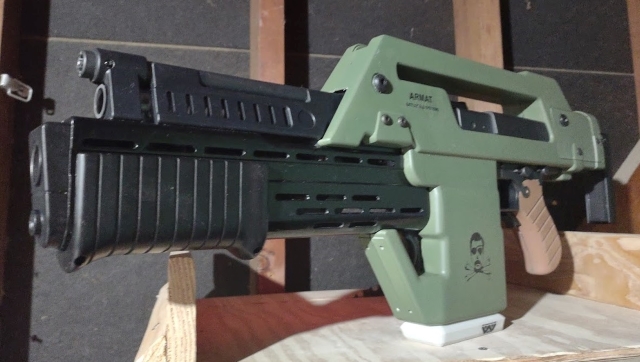
Celebrating the 35th anniversary of the iconic ALIENS film, Hasbro has released under the Nerf LMTD series the M41-A Pulse Blaster, capturing authentic details inspired by the equipment of the film’s Colonial Marine Corps.
//// IN A REALLY UGLY COLOR \\\\
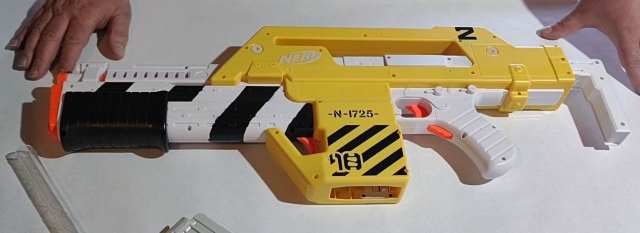
With shipping, directly from Hasbro I picked this replica up for about $110.00. Seemed very reasonable.
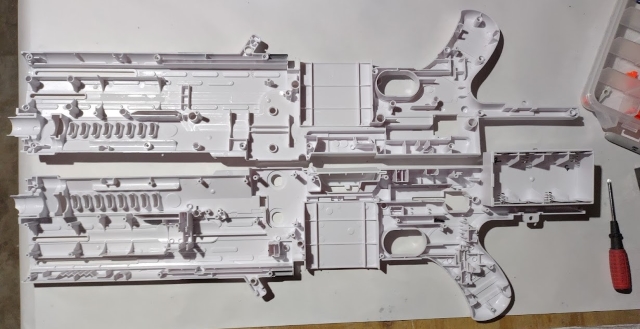
So, I invite you to follow along with me as I turn this toy into a screen ready replica prop.
 Removing the Shroud
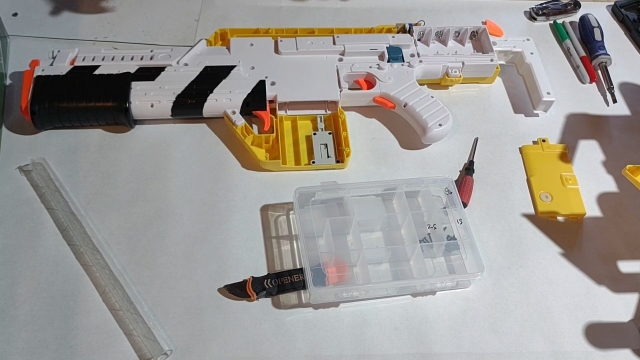
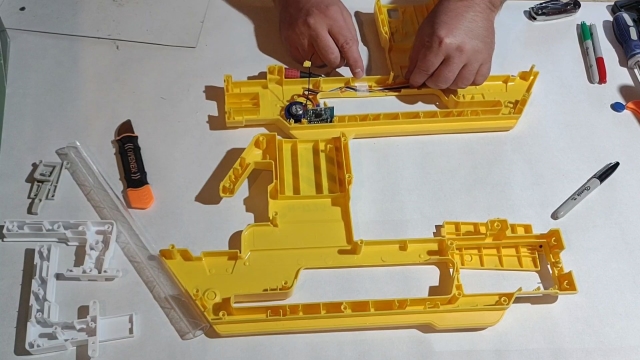
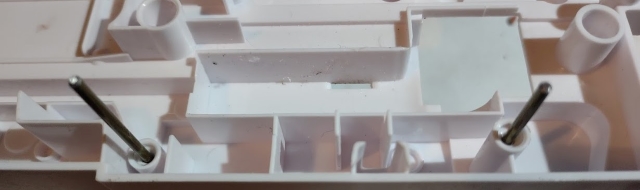
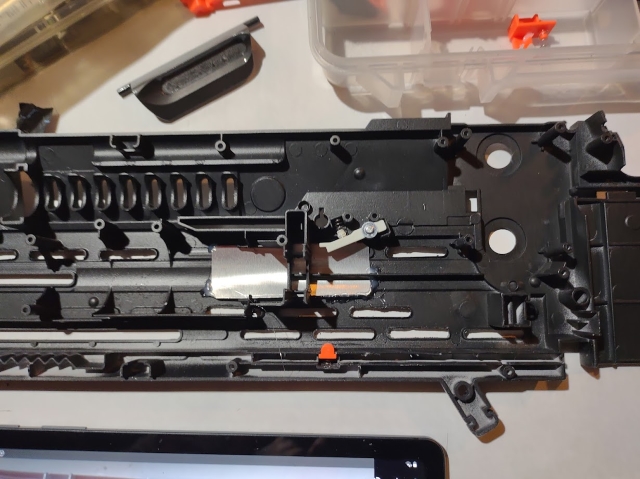
The clear tube in the shot is the replacement barrel for the Nerf darts. As I'll explain later (again) Nerf added a third barrel for it's darts. A simple trim down and replacement from an opaque orange tube to a transparent one will hide it perfectly and keep it fully functional.
I should mention also that if you don't have one, find yourself a cheap organizer box. These are great for keeping your screws and small parts from getting lost. freely labeling the parts on the lid with a sharpy is very handy.

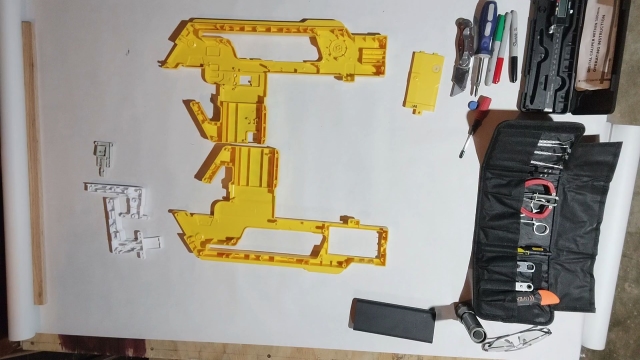
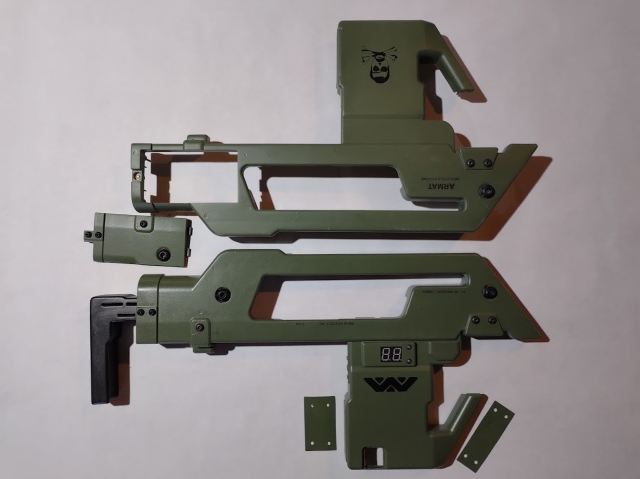
Shrouds and Rifle Butt-Stock
You'll notice the Rifle butt-Stock in the upper left hand corner. It will be getting some attention as well. Now it's time to remove some of the electronics. There are small buttons and screws that you'll need to keep track of.
Removing the Display and Sound.
The speaker sits right behind one of the large replica bolts. Nerf has cleverly cut holes in and around it so it's practically impossible to see. This will present a minor problem later.

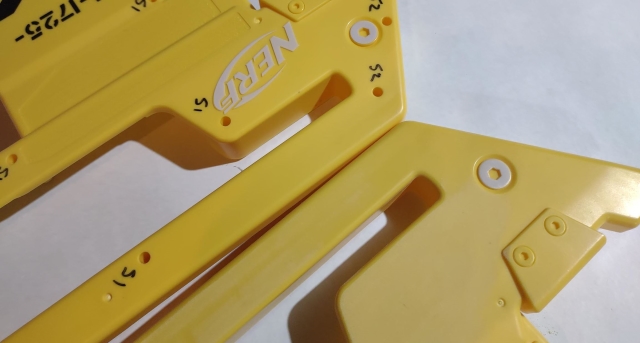
Labeling the Holes
Later this demonstration of screw organization and labeling will turn out to be overkill. But this is still best practice.
 Assorted Screws
There are 19 screws of various sizes located in the shroud alone. So be sure to keep 'em straight... If you're gonna use them that is.
 Warning Labels
It wouldn't be a toy in America without tiny legal fine print.
 Removing the Logo
Using some 120 grit sand paper made quick work of the Nerf logo. Just be sure to follow it up with finer grits.
 Replacing the Plastic Bolts
Because of the speaker that has been placed behind one of the larger bolts, they will not get an actual bolt head. But everything else will.
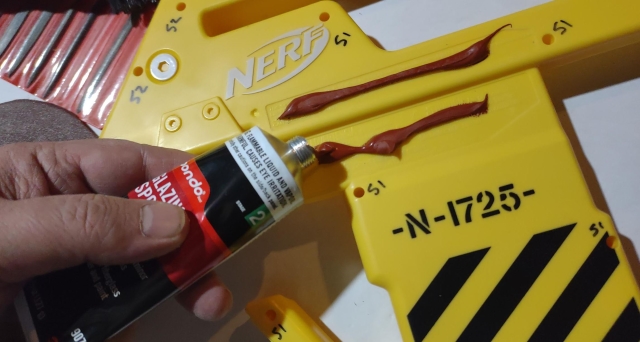
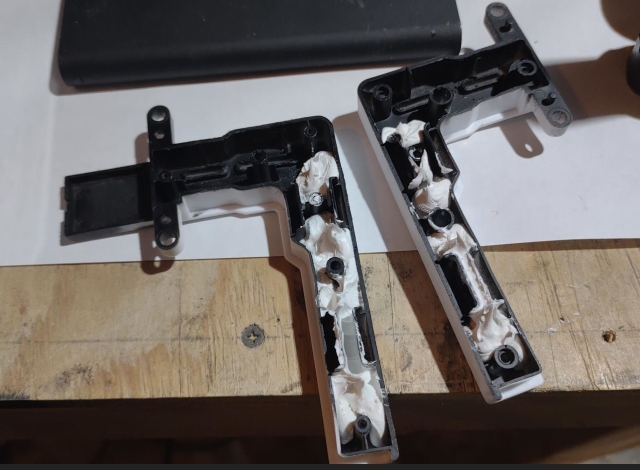 Filling the inside of the Butt-Stock
Because the Pulse Rifle is a hollow plastic toy, it will never feel solid or realistic. To resolve this issue, all of the voids will be filled with either caulk (heaviest of the cheap fillers) or clear silicone.
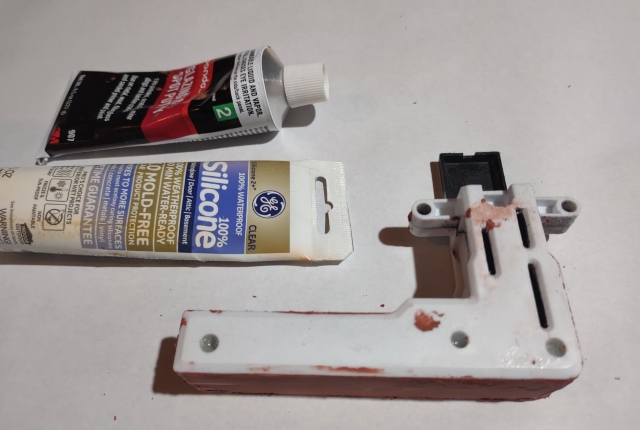
Filling the Outside of the Butt-Stalk
As you can see, more screws. These will need to disappear. So, using a little silicone and some Bondo filler, the screw holes and seems will just disappear.
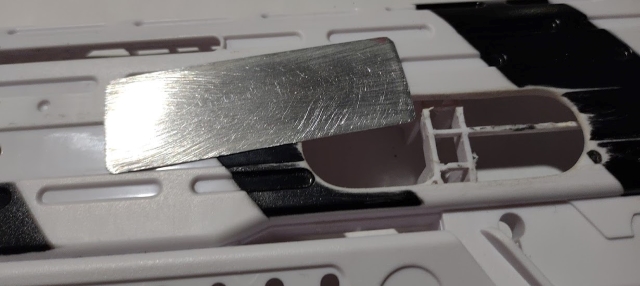
Access Panel Replacement
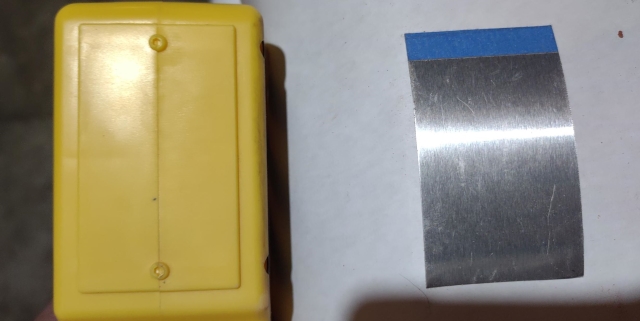
Using Aluminum Roof Flashing, I've cut out metal plates to replace the "FAU" plates with.
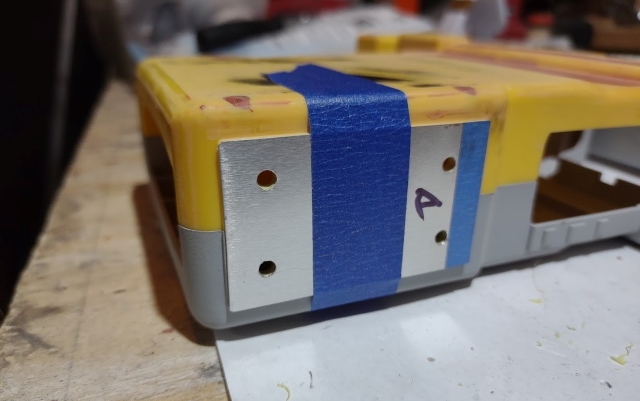 Panel 1A
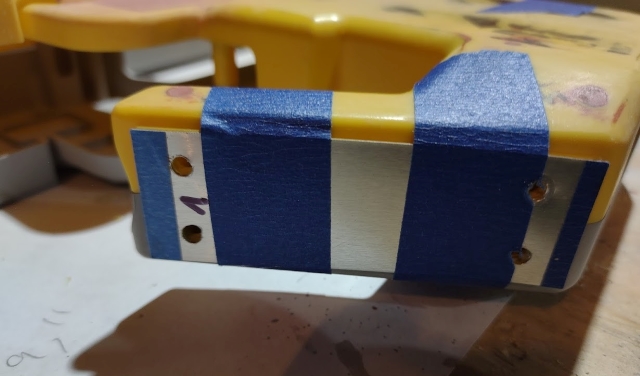 Panel 1B
These will get a thorough paint job as well. Currently I'm on the hunt to borrow someone's Alphabetical and Numerical punches to add a little military issue to them.
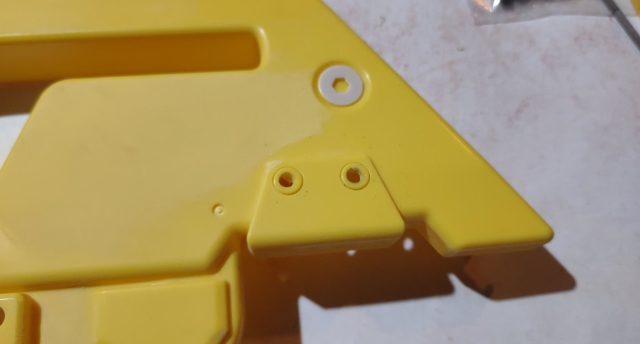
 Solving the binding issue
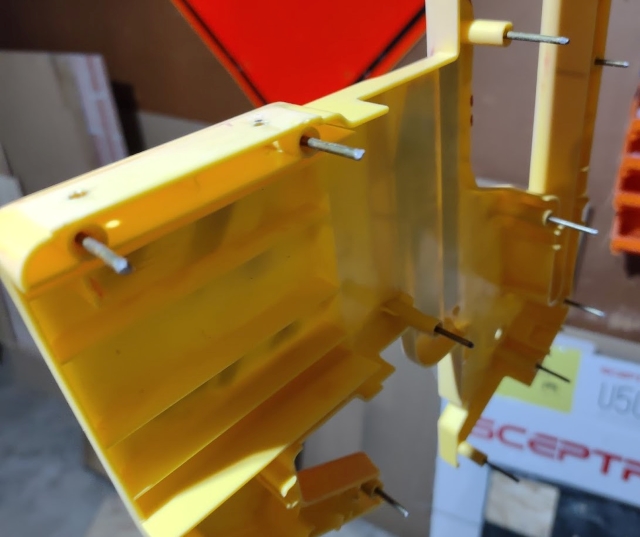
As I mentioned earlier, there are 19 screws of various sizes located in the shroud alone. And with each screw, there is a hole. So in order to maintain the rigidity of screws while removing the holes they create, I've replaced the screws with pins.
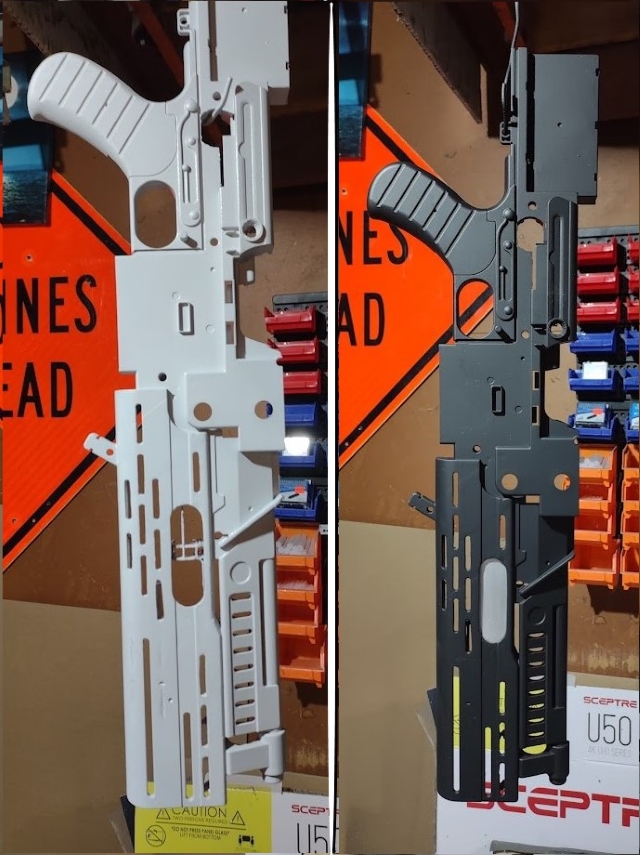
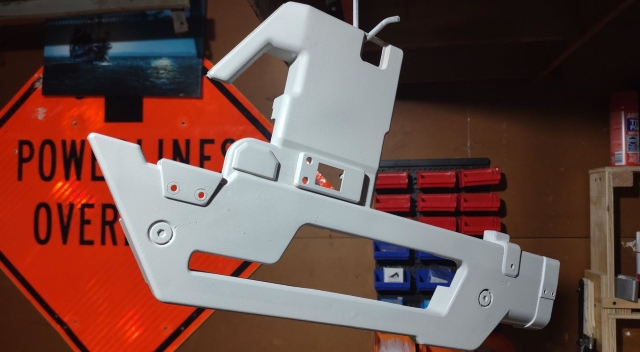 Sand and Prime
As you can see now that primer has been applied, it's nice and smooth.
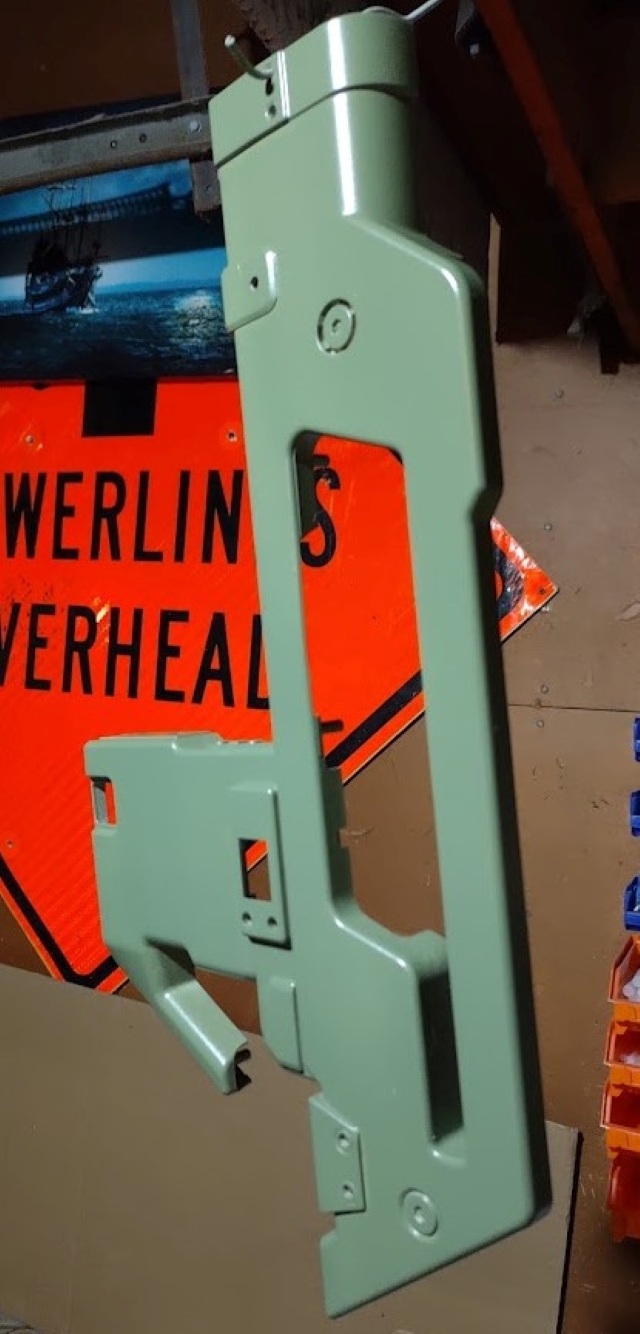 Painting
Once I've finished painting the shroud, I'll install the bolts and start the weathering process.
 Decals
Adding details using rub on fonts. The letters will look better after the clear coat is applied.
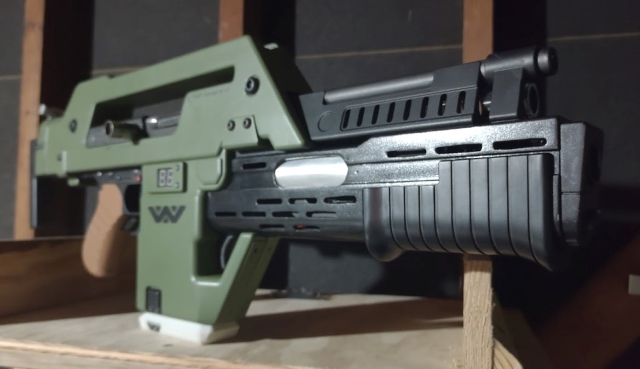
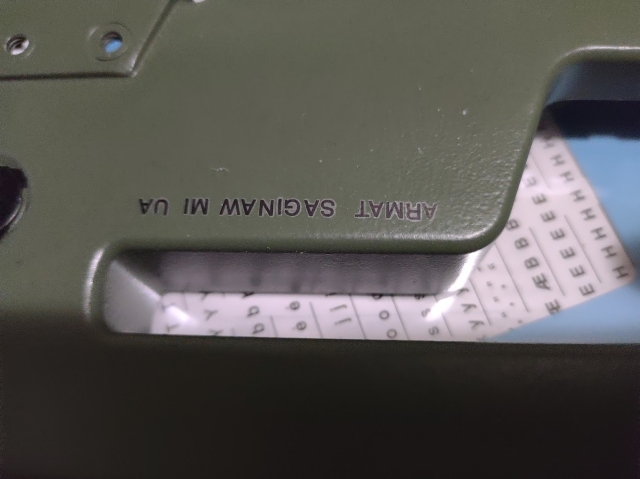
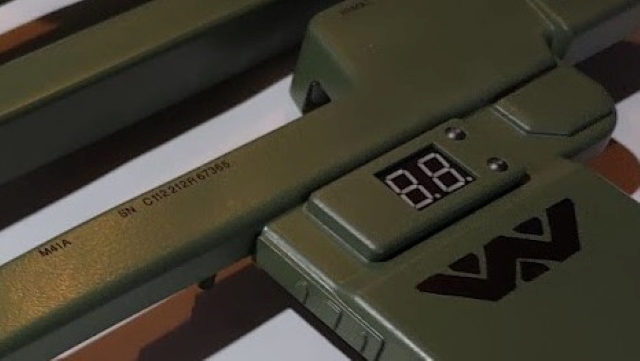 The counter is re-installed and the Weyland-Yutani logo is added. (Note the designations for the M41A and the Serial Number just to the left.
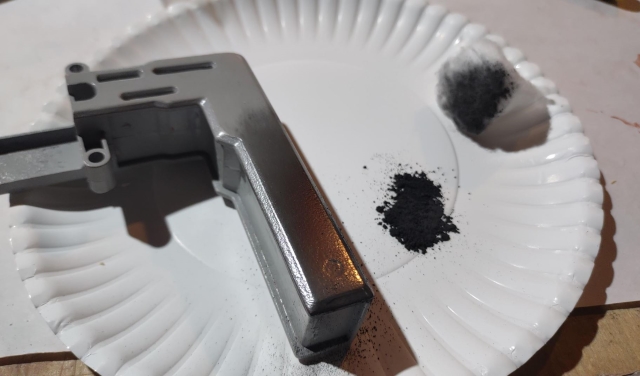
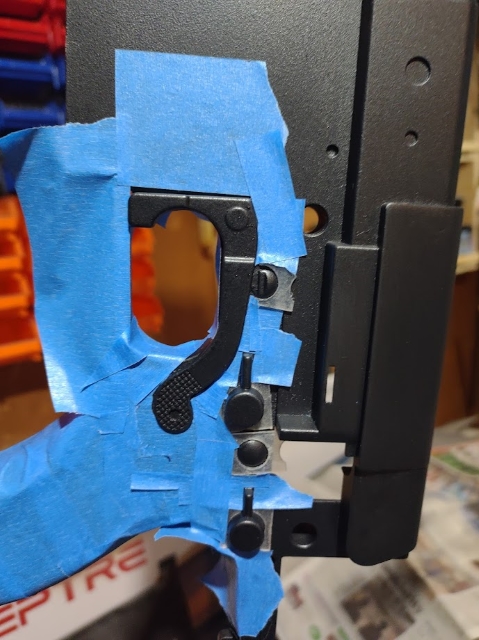
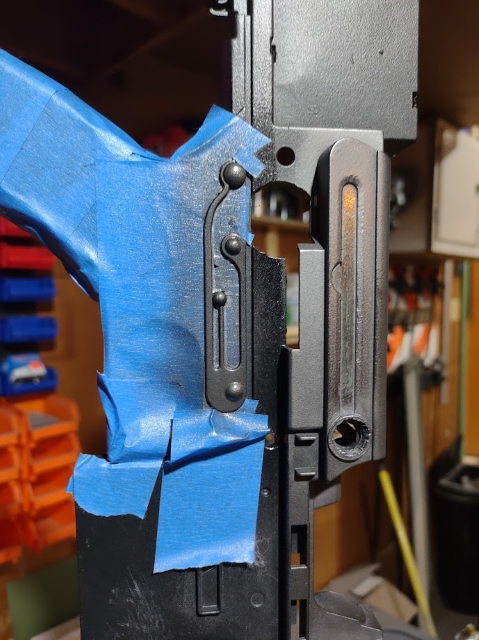
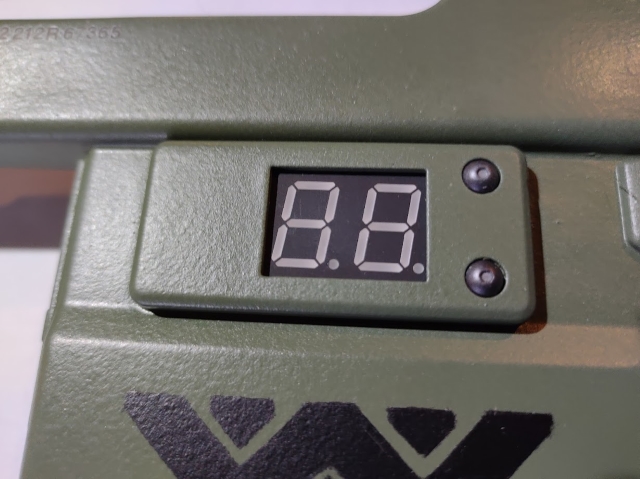 The 2 Allen screws are actually buttons for the read out. Using Graphite, I made them metallic looking.
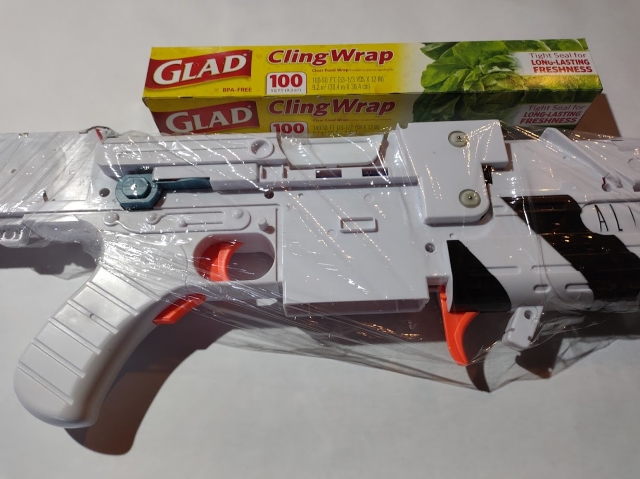 For the next process (Filling the voids), I wrapped the gun in Cling Wrap to keep the caulk from sticking.
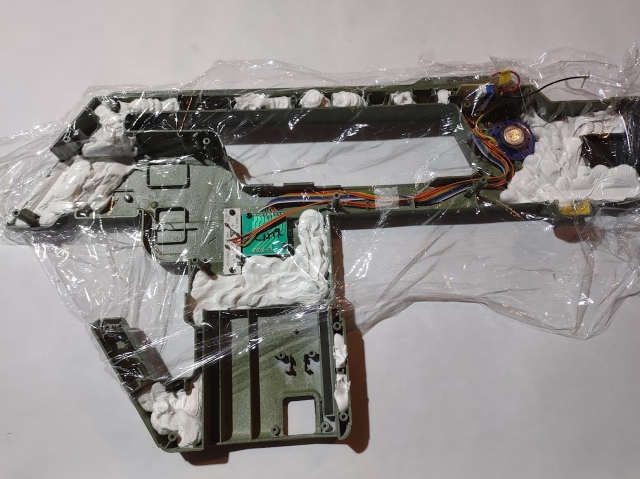 I marked out and filled the designated voids to ad weight and substance. I'll have to give this a few days to dry.
 After it dried, I gave the shroud a good clear coat to protect the paint, decals and details prior to weathering. This will be the last time we visit with the shrouds for a while.
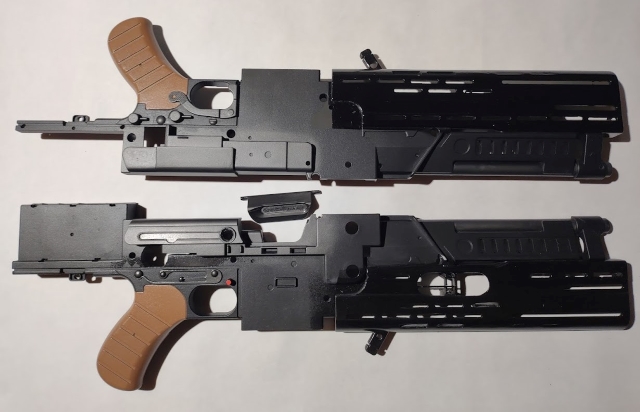
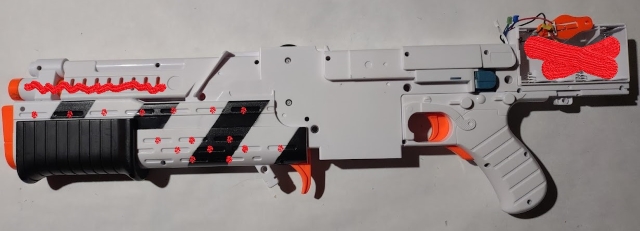 Like the shroud, pins will be added to most points. However the screws (and their holes) that would normally be covered by the shroud will still be used. Here you can see my primary concerns for this weekend. Fix the "3rd" barrel, cut out all of the slots to be exposed and fill in all of the designated slots.
 First thing to do is gut the components.
Naturally, many of the components will need to be painted.
Now that the internals have fully been removed, we'll need to work on the shell. The Grenade Launcher with Pump Action deserves better then a plastic door with the word "ALIENS" printed on it. Because the "Action Door" is located under support structures for the nerf internals, careful removal is needed. Just enough to slide the new door in.
I've been a little worried about the difficulty of removing that door without damaging the supports. Turns out it was a whole lot easier then I thought.
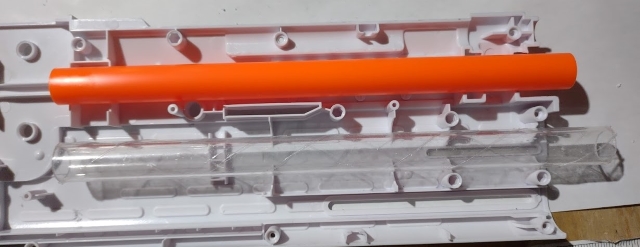
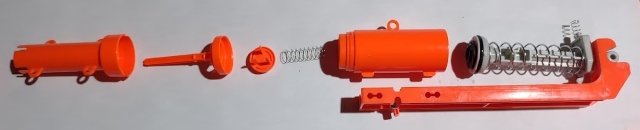
One of my biggest "Peeves" about this is the 3rd barrel. In the movie there are only 2 barrels, the machine gun and the grenade launcher. There is NO 3RD BARREL! But, Nerf darts are to big for the top barrel. So they made a 3rd one. Now removing the 3rd barrel is easy enough, but then it won't shoot darts any more. So, the question is, how do I both remove and keep the barrel. You make it invisible. So I purchased an acrylic tube to replace it.
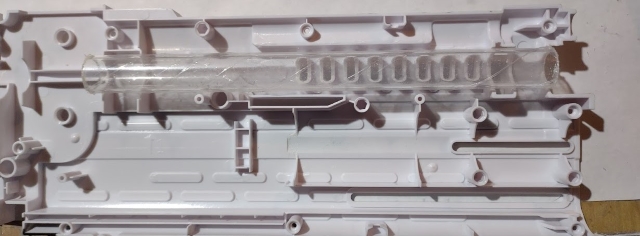
Now it might look a little cloudy right now, but that's because it has protective plastic on it. I'll remove it once it's ready to go back together. As it turned out the new clear tube is just slightly larger diameter. So I wrapped it in sand paper and sanded it into place. Then I cut off the barrel tip from the carcass and now I have a perfect fit.

The next part was both tedious and nerve racking. First off, not all of the slots pressed into the carcass are visible. There are a few covered by the shroud and a few more hidden behind the pump handle. Starting with the rounded ends, I used a drill bit on both side to get something accurate. Then I used a Dremel to "connect the dots" and turn 2 holes into 1 slot.
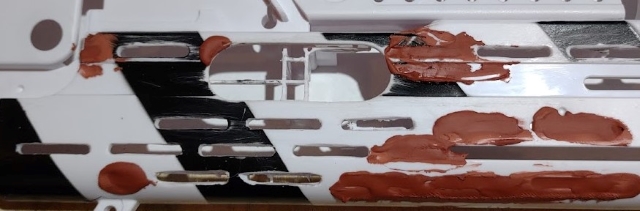
And then I spread Bondo into the slots that I wanted removed. Sanding is still pending.
And Naturally, because of the slots, the internals also need to be painted. This is the tube for the grenade launcher.
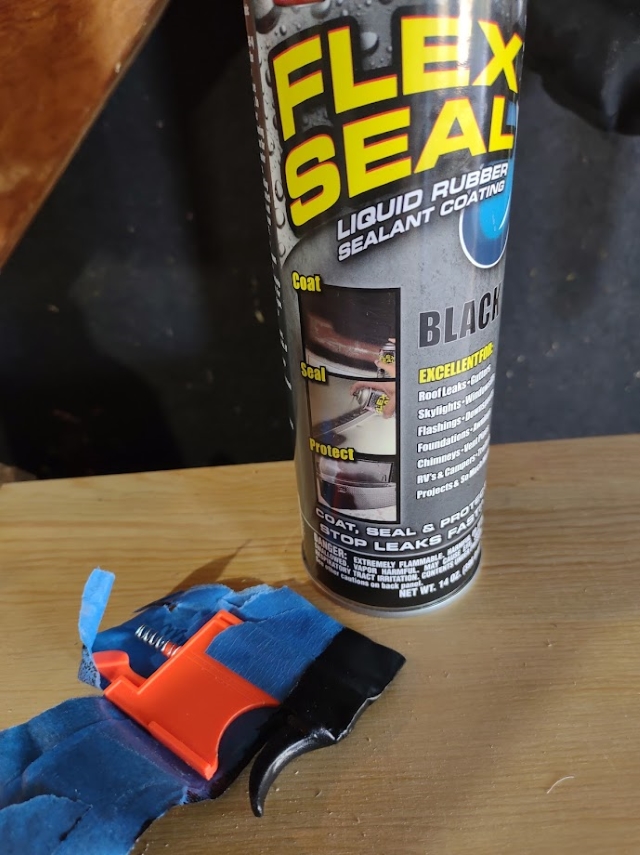
And this is the primary trigger. Because of my concern that paint would ware off, I used liquid rubber on it. It worked really well.

Here I gutted the battery case. This C sized battery pack case will allow the room for the USB battery backup I plan to use.
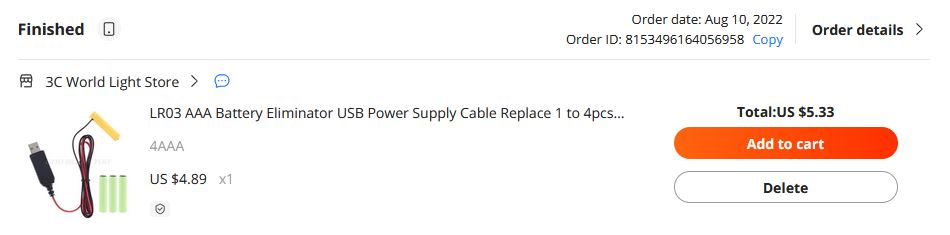
This is the component I used. I bought this last year to replace 4 AAA batteries. As it happened, I didn't need it. So this seemed perfect to deliver the 6 volts I needed to replace the 4 "C" size batteries.
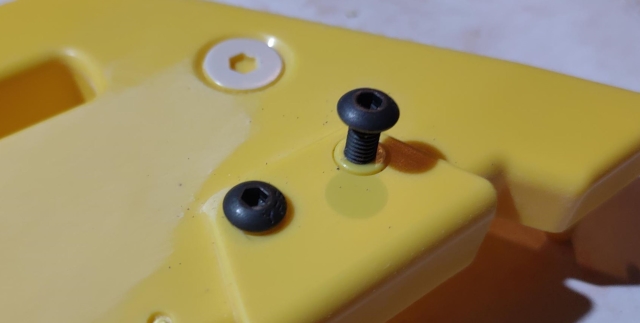
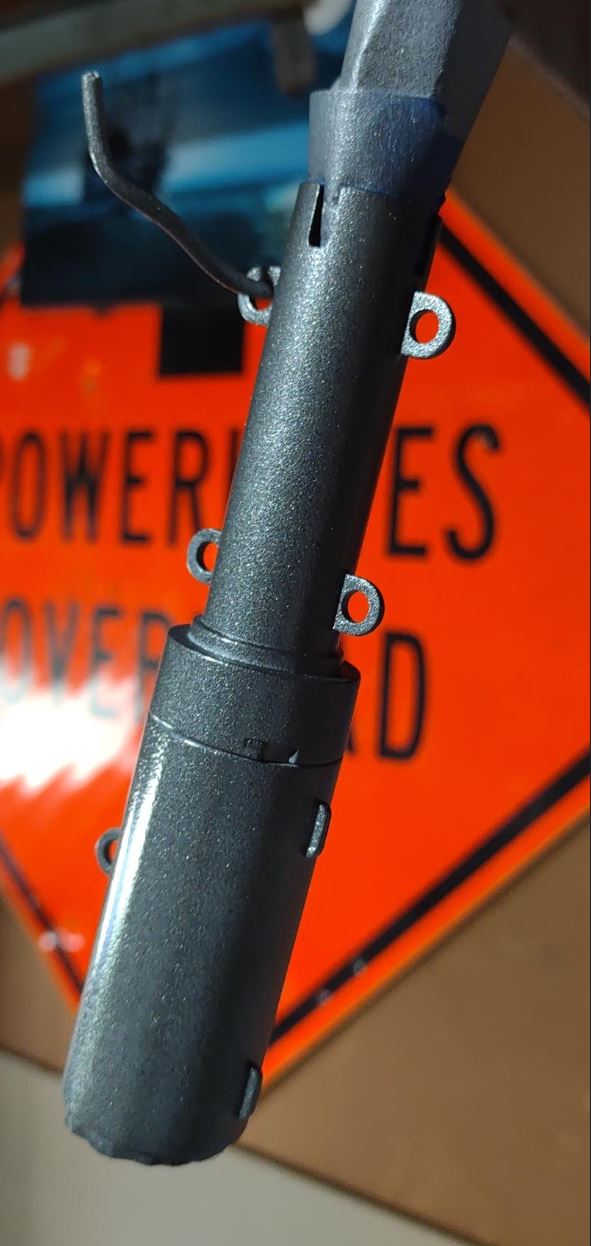
Adding more pins to replace screws. Don't worry though, I have quite a few screws that will be hidden by the shroud to keep it together in one solid piece.
Next is Primer and Paint. The paint job will have different tones and finishes on the gun. For instance the hand guard covering the pump action grenade launcher will be a high gloss to simulate the stamped metal that a real one would be made of. And powdered graphite will be used on the gun barrel and the bolt chamber mechanism to give it a bit of metallic realism.
Which involves a lot of masking.
For the individual shades of paint. Here I used graphite to get the metallic sheen.
So I can get results like this.

Next, with the aid of my assistant, we began piecing the mechanisms together.
First I had to install the aluminum door for the grenade launcher.
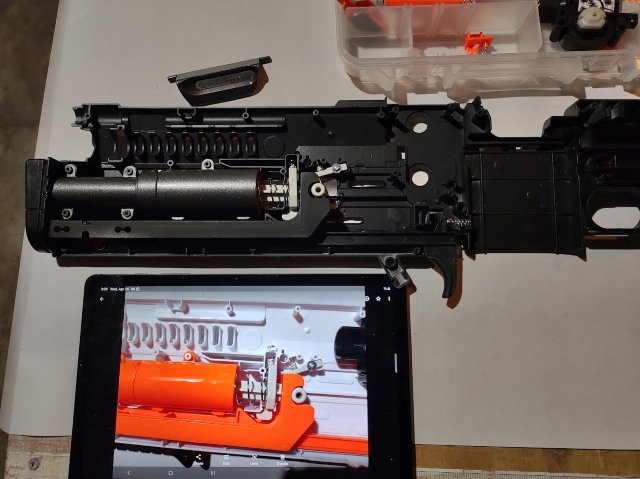
Using my tablet I returned the newly painted internal parts to their original positions.
/// CIRCUIT MOD \\\
During the making of the movie, the originally planned weapon was to be made from an MP5 SMG. However the muzzle flash was unimpressive, so they replaced it with the Thompson M1A1 SMG.
Classically known as a "Tommy Gun" by mobsters of the 1920s and 30s.
So, what comes next. A new circuit. I've added a new circuit MOD that will allow for muzzle flash (not nearly as impressive). When completed, I should be able to attach a specially designed Muzzle Break to the barrel that will produce muzzle flashes using LED filaments. Using the 2 circuit boards listed below and creating a custom plug, I've created, tested and installed the new circuit MOD.
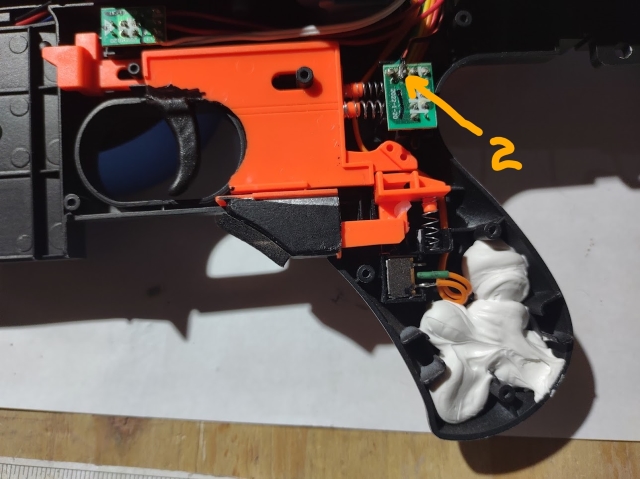
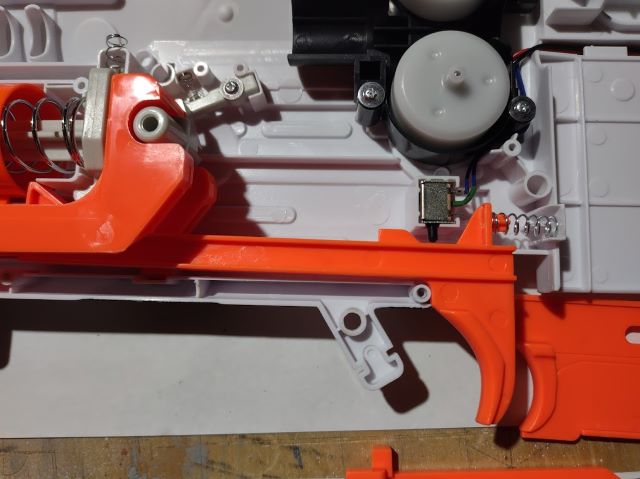
Starting from the beginning. You need to connect your positive wire to the lead labeled #2 on the trigger board. This will give you the 6 positive volts needed when ever you pull the trigger. And you should have your ground wire connected directly to your Battery/Power case.
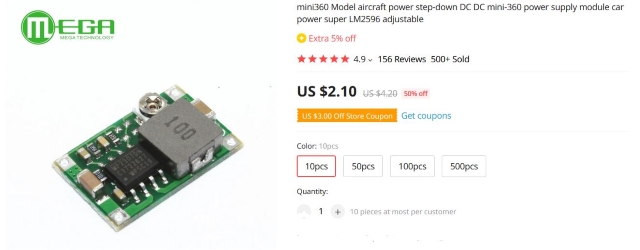 Than you need to connect both the positive and negative to this step-down voltage regulator LM2596 to get about 3.5 to 4.5 volts.
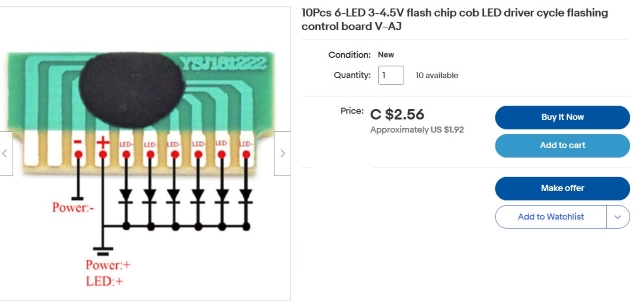
To power this flasher control board. Than run your lines to...
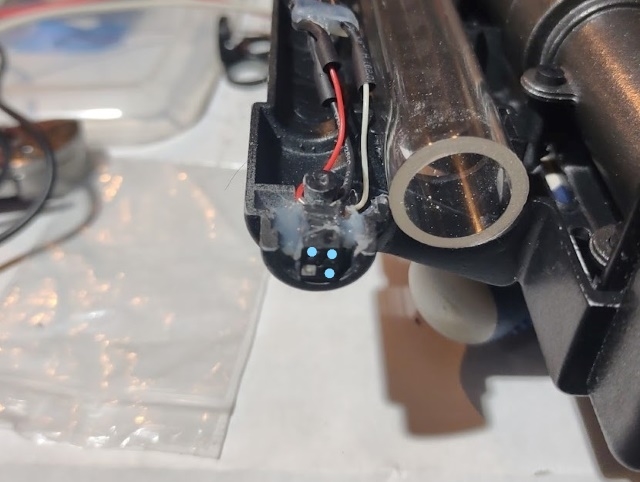
this custom 3 prong plug I created. I've marked the 3 female ports with blue dots. The white looking one is filled in (because I only need 3 lines, and it has 4). Once I've finished making the Muzzle Break, it'll plug right in for a snug and stable fit at will. Than flash/strobe whenever the trigger is pulled. It can then be easily removed.
/// TEST FIT \\\